How to change location on Mac using a VPN?

How to change location on Mac using a VPN?

Table of Contents
Changing location on Mac with VPN using a laptop.

Changing the location on your Mac can be a game-changer, whether you’re looking to access geo-restricted content, maintain privacy, or want to explore the web from a different location. With technology advancing, it’s easier than ever to change location on a Mac, especially using a VPN (Virtual Private Network).

A VPN not only hides the IP address but also passes through the connection by the server all over the world. This makes your Mac look like it is browsing from a different geographical location altogether.

In 2024, using a VPN to change location on a Mac isn’t just about privacy; it’s about gaining access to the global internet without boundaries. Whether you want to stream shows available in other countries or protect your data, understanding how to change location on Mac can give you that flexibility.

Let’s dive and Learn how to change location on Mac using a VPN to protect your privacy, access geo-restricted content, and manage network settings in 2024 with the best methods available, and how you can get started easily!

Why do we need to Change Location on Mac?

Changing location on your Mac has become a popular move for many users, and there are several compelling reasons why you should consider doing it. From enhancing your online privacy to unblocking content restricted by geographical regions, here’s why you should consider changing your MAC location.

1. Access Geo-Restricted Content

Have you ever tried to watch a favourite show that you like only to realize that it is not available in your country? With a VPN, it is very easy to change location on Mac and thus avoid such restrictions. From Netflix libraries and sports broadcasts to exclusive YouTube content, switching your location allows you to access content from all over the world.

2. Enhance Your Online Privacy and Security

In the modern era where data protection is of utmost importance, location change on Mac can be quite effective. A VPN hides your IP address, which makes it very difficult for websites, hackers, and even your ISP to monitor your activities online. This is especially so when connecting to public Wi-Fi networks since the risks are higher.

3. Avoid Censorship and Internet Restrictions

If you’re traveling or living in a country with strict internet regulations, changing your location on Mac allows you to access the unrestricted internet. A VPN routes your connection through servers in locations where content is not censored, giving you the freedom to browse and communicate without barriers.

4. Better Online Shopping Deals

It is a fact that the prices for flights, hotels, and even some products depend on the location of the user. This is because by changing the location of your Mac, you can be able to get better deals from other areas and thus save some cash.
This technique is widely used by those who are conscious of the prices in the market and would wish to compare prices from all over the world.

5. Play Region-Locked Games

For gamers, changing the location on Mac can open up new opportunities. Whether you want to access early game releases or play on servers that are typically restricted to other countries, a VPN makes it possible. It’s a great way to enhance your gaming experience and connect with friends around the globe.

6. Manage Multiple Network Locations

It is helpful to manage network locations on your Mac if you often change between different connections. For instance, you may have different preferences for the networks at home, at the workplace, or while on a business trip. By changing your Mac’s location settings, you can easily switch between configurations that best suit your needs.

Changing location on Mac is more than just a tech trick. It is a technique that can enhance your internet experience to the maximum. Whether it is for privacy, entertainment, or convenience, understanding how to change your location can help you have more control over how you engage with the online environment.

Changing Location on Mac with VPN
Changing location on Mac with VPN using a laptop.

The best way to change location on a Mac is by using a VPN. A VPN (Virtual Private Network) changes the path of your internet connection through a server in a country of your choice, and your IP address is replaced with the one from that country.

This not only allows you to bypass the restrictions and get access to the content that is otherwise unavailable but also makes your activity more secure. Now, let’s discuss how to change location on a Mac using a VPN and why it is the best way to do it.

1) How to Change Location on Mac Using a VPN?

Changing location on a Mac with a VPN is straightforward. Here’s a simple step-by-step guide to get you started:

  • Choose a Reliable VPN Service: Select a VPN that offers a wide range of server locations, strong encryption, and user-friendly macOS apps. Popular options include NordVPN, ExpressVPN, Surfshark, Private Internet Access VPN, and CyberGhost VPN.
  • Download and Install the VPN App: Head to the official website of your chosen VPN provider and download the macOS version of their app. Follow the installation instructions to set it up on your Mac.
  • Log In and Connect to a Server: Open the VPN app, log in with your credentials, and select a server location. For example, if you want to access content available in the UK, connect to a UK server.
  • Verify Your New Location: After connecting to the VPN, check your IP address to ensure your location has changed. You can do this by searching “What’s my IP” in your browser to confirm the new location matches the server you chose.
  • Start Browsing: Once your location is verified, you can begin browsing as though you are in the selected location. Enjoy unrestricted access to content, enhanced privacy, and security.

2) Best VPNs for Changing Location on Mac in 2024

When it comes to changing location on Mac, not all VPNs are created equal. Here are some of the top VPNs recommended for Mac users:

Best VPNsKey Features
NordVPNFast speeds, extensive server network, excellent for streaming
ExpressVPNHighly secure, supports many platforms, high-speed connections
SurfsharkUnlimited devices, budget-friendly, great for families
Private Internet Access (PIA)Advanced privacy settings, large server network
CyberGhost VPNEasy to use, optimized for streaming and torrenting

3) Troubleshooting: Can't Change Location on Mac with a VPN?

If you encounter issues while trying to change location on Mac using a VPN, here are some common fixes:

  1. Check Your Internet Connection: Ensure that your Mac is connected to a stable internet connection. A weak or unstable connection can prevent the VPN from working correctly.
  2. Switch Servers: Sometimes, the server you choose may be down or overloaded. Try switching to a different server in the same location.
  3. Clear Browser Cache and Cookies: Old data stored in your browser can reveal your real location. Clearing your cache and cookies can help the VPN work more effectively.
  4. Update the VPN App: Ensure your VPN app is up-to-date. Outdated apps may not work properly with the latest macOS updates.
  5. Contact Customer Support: If all else fails, reach out to your VPN provider’s customer support. They can guide you through specific troubleshooting steps.

Changing location on Mac using a VPN is a powerful way to enhance your online experience. With the right VPN, you can unlock a world of content, protect your privacy, and browse with the freedom you deserve.

Alternative Methods to Change Location on Mac
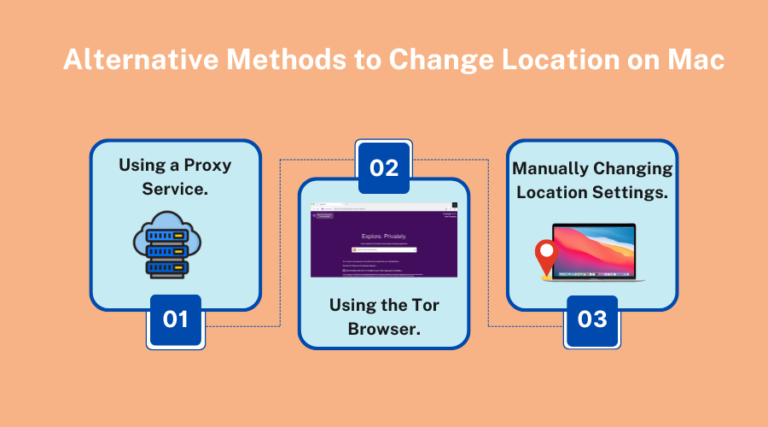
Three alternative methods to change location on Mac: Proxy Service, Tor Browser, and Manual Settings.

While using a VPN is the most popular and reliable way to change location on a Mac, there are other methods available. These alternatives may not offer the same level of security or ease of use as VPNs, but they can still help you achieve similar results in certain situations. Let’s explore some of these alternative methods to change location on Mac.

1) Using a Proxy Service

A proxy service works by connecting your Mac to the internet through a different server to alter your IP address. This can make it look like you are accessing the internet from a different location than you actually are. Here’s how you can use a proxy to change location on Mac:

  • Find a Proxy Service: There are free and paid proxy services available. Free options might be slower and less secure, so a paid proxy is generally recommended for better performance.
  • Configure Proxy Settings on Your Mac: Go to “System Preferences” > “Network,” select your active network connection, click on “Advanced,” and then navigate to the “Proxies” tab. Enter the proxy server details provided by your chosen service.
  • Verify Your New Location: As with VPNs, you should check that your IP address reflects the new location by using an online IP checker.

Although proxies can be switched on Mac, they do not offer encryption most of the time, so your data is less protected than when using a VPN. Proxies are most effective for simple tasks, such as avoiding simple content filtering.

2) Using the Tor Browser

The Tor Browser is another option for changing location on Mac. Tor routes your connection through a network of volunteer-operated servers, which makes it extremely hard for anyone to monitor your activities online. Here’s how to use Tor to change your location:

  • Download and Install Tor Browser: Go to the official Tor Project website and download the Tor Browser for Mac. Install it by following the on-screen instructions.
  • Connect to the Tor Network: Open the Tor Browser, and it will automatically connect you to the Tor network. This process can take a minute or two.
  • Browse Anonymously: Once connected, you can browse the internet as if you are in a different location. Tor changes your exit node randomly, which affects your apparent location.

Tor is very good at hiding the user’s identity. Still, it is much slower than normal browsers because of the encryption and the routing. It is good for anonymity but not so much for streaming or any other high-bandwidth activities.

For a detailed guide on using Tor and its benefits, check out this resource to learn about Tor country codes on Windows, Max & Linux.

3) Manually Changing Location Settings

For some specific apps and services, you might be able to manually change your location settings directly on your Mac:

  • Changing Location in Browsers: Some browsers allow you to spoof your location through developer settings or by using extensions. For example, in Google Chrome, you can go to Developer Tools > Sensors > Geolocation and select a custom location.
  • Adjusting System Location Settings: You can change location settings on Mac by managing your location services under “System Preferences” > “Security & Privacy” > “Location Services.” This won’t change your IP address but can adjust how certain apps perceive your location.
  • Using GPS Spoofing Apps: While Macs do not have built-in GPS, some third-party applications can simulate GPS data for specific apps that rely on location services.

These alternative methods offer various levels of success and security when trying to change location on Mac; for those who need reliable privacy and access to global content, using a VPN remains the most comprehensive solution. However, understanding these alternatives can give you more flexibility and options depending on your specific needs.

Understanding Network and IP Address Changes
Understanding network and IP address changes on Mac.

Changing your Mac’s location often involves modifying your IP address or network settings. Understanding these changes can help you manage how your Mac connects to the internet and how websites and online services perceive your location. Let’s dive into the basics of network and IP address changes, and how they relate to changing location on Mac.

What Is an IP Address?

An IP (Internet Protocol) address is a unique string of numbers that is assigned to your Mac when it goes online. It works like an address that enables the devices to interact with one another. Your IP address shows where you are, which is why it is used when you want to change location on Mac.

Dynamic vs. Static IP Addresses: The majority of home networks employ dynamic IP addresses that may vary each time you go online. On the other hand, static IP addresses do not change their values. VPNs often provide a dynamic IP address from the server locations of the VPN service provider.

Public vs. Private IP Addresses: A public IP address is an IP address that is accessible on the internet and can be altered with the help of a VPN or proxy. A private IP is used within your local network and does not have any direct relation to your geographical location.

How to Change IP Address on Mac?

Changing your IP address on Mac can be done in a few different ways, depending on your needs:

Using a VPN: As mentioned, the easiest method of changing the IP address is by using a VPN since it redirects your connection to another server. This makes your Mac look like it is from a different location when browsing.

Renewing Your IP Address: It is also possible to renew your IP address through your Mac’s Network settings manually. Open the “System Preferences” and click on “Network,” then select your connection, click on “Advanced,” and then go to “TCP/IP” and click on “Renew DHCP Lease.” This may give you a new IP address but it will not change your apparent location much if your ISP assigns you a new IP address in the same range.

Using a Proxy Server: Like VPNs, proxies can mask your IP address, but they do not offer the same level of protection. Configure a proxy under the network settings of your Mac by inputting the server information under the ‘Proxies’ sub-tab.

Network Location vs. IP Address Changes

Changing your IP address can affect how your location appears online, but on a Mac, changing your network location means managing different sets of network preferences. Here’s how they differ:

Network Location: This feature allows you to save multiple network settings configurations (like home, work, or public Wi-Fi) on your Mac. It doesn’t change your IP address or location but makes switching between different network setups easier.

IP Address: This directly affects your visible location online. Changing your IP through a VPN or proxy is essential for accessing content that’s restricted to certain geographical areas.

How to Manage Network Locations on Your Mac
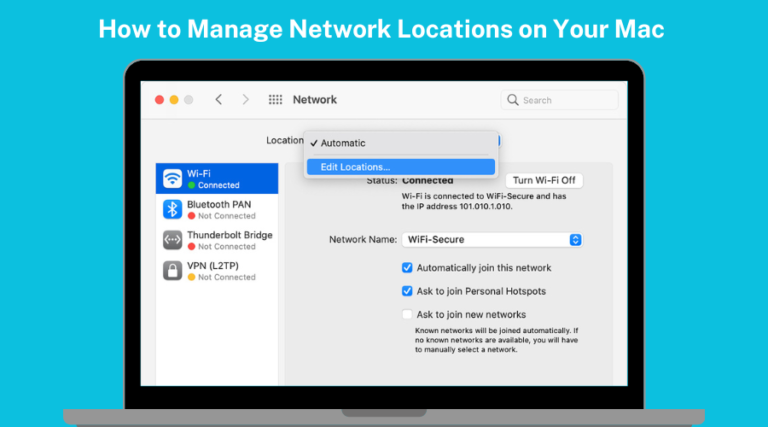
Managing network locations on a Mac through the network settings panel.

Network location management is helpful when it is necessary to switch between different Internet connections. For example, you may have one configuration for your home network and another for when you are at a café. Here’s how you can manage these settings: 

Create a New Network Location: Open the “System Preferences” and click on “Network. ” Look at the top of the window and click on the word “Location” and then click on “Edit Locations. ” Click on the “+” sign to add a new location, give it a name, and set up the preferences.

Switch Between Locations: To change between the saved locations, go back to the “Location” drop-down list and choose the configuration you wish to use.

Edit or Remove a Network Location: To rename, modify, or delete existing network locations, go to the “Edit Locations” menu.

It is always helpful to know how to handle network and IP address changes on your Mac so that you can have more control over your online presence. If you want to switch location on a Mac for any reason, including privacy, accessibility, or convenience, then learning about these tools will help you make your online experience better.

Final Thoughts : Change location on a Mac

Changing location on Mac is a useful feature that can help improve your browsing experience if you want to unblock content, hide your IP address, or adjust your network settings.

With a VPN, it becomes very simple to hide your IP address and select the most appropriate location. Apart from VPNs, there are other options, such as proxies and the Tor browser, that can also help you to change your location, but with some drawbacks.

Managing network locations on your Mac allows for quick adjustments to your network settings, making it easier to switch between different environments like home, work, or public Wi-Fi.

Understanding the difference between changing your IP address and managing network locations helps you make the most of your Mac’s capabilities without unnecessary complications.

In conclusion, the ability to change location on Mac enables users to navigate the internet as they wish, protect their identity, and manage their interactions. It is possible to browse the web freely and securely if you have the right tools and settings at your disposal.

When using these strategies, ensure that you frequently monitor your settings and upgrade your tools to enhance the security and effectiveness of your online activities. Whether you are a business traveler or a privacy freak, knowing how to change location on your Mac is a skill that will add value to your digital life.

For more details on the safest and most private VPNs for Mac, don’t miss our comprehensive guide on 5 Best VPNs for Mac to help you choose the best VPN for your needs.

Frequently Asked Questions

1. Is it legal to change your location on your Mac?
Legal implications of changing location on Mac.

Yes, it is legal to change your location on your Mac most of the time, whether for privacy purposes or to access geo-restricted content.

However, using this method for unlawful purposes like avoiding licensing regulations or streaming content prohibited in your area may infringe on terms of service and legal requirements.

Always ensure that your actions comply with the legal guidelines of your country.

2. Can you unblock streaming content by changing location on a Mac?

Yes, it is possible to unblock streaming content on a Mac by changing your location with the help of a VPN. A VPN enables you to connect to servers in different countries, and hence, it will seem like you are browsing from that country.

This can assist you in unblocking geo-restricted content from streaming platforms such as Netflix, Hulu, and BBC iPlayer.

3. How do I change my GPS location on a Mac?
Changing GPS location on a Mac using a laptop

It is impossible to change the GPS location on a Mac directly because Macs do not have built-in GPS hardware.

However, you can fake a different location by using a VPN that alters your IP address or by inputting your desired location in some apps or services.

Some browser extensions also enable you to fake your location for certain purposes.

4. Does your Mac track your location?

Yes, Macs can track your location through location services, which are Wi-Fi, Bluetooth, and your IP address. These settings can be turned on or off through the System Preferences under the “Security & Privacy” tab.

Changing these settings can assist you in managing which applications and services are allowed to use your location information.

5. What Are Location Services on Mac?

Location Services are built into macOS to help apps provide location-based functionality. This can include showing relevant search results, mapping services, weather updates, and more.

However, enabling Location Services can also make your real location visible to apps and websites, which might conflict with your goal to change location on Mac using a VPN or other tools.

The 5 Best VPNs for Mac and MacBook (Safe and Private) in 2024?

The 5 Best VPNs for Mac and MacBook (Safe and Private) in 2024?

Table of Contents

The 5 Best VPNs for Mac and MacBook (Safe & Private) in 2024.

If you’re on the hunt for the best VPN for Mac in 2024, you’re in the right place. 

As Mac devices continue to gain popularity, now holding an impressive 17.93% of the desktop and laptop market share, finding the right VPN has never been more crucial. 

With cybersecurity threats on the rise, ensuring your Mac’s privacy and security is essential. 

Mac devices are generally more secure than Windows; a VPN can further enhance online privacy and security.

With a reliable VPN for macOS, you can browse the web safely, access geo-restricted content, and even unblock streaming services like Netflix and BBC iPlayer.

We have compiled a list of the top 5 Best VPNs for Mac and MacBook to keep your browsing safe and private this year.

Whether you are a casual or experienced user, a VPN on this list will meet your needs and budget.

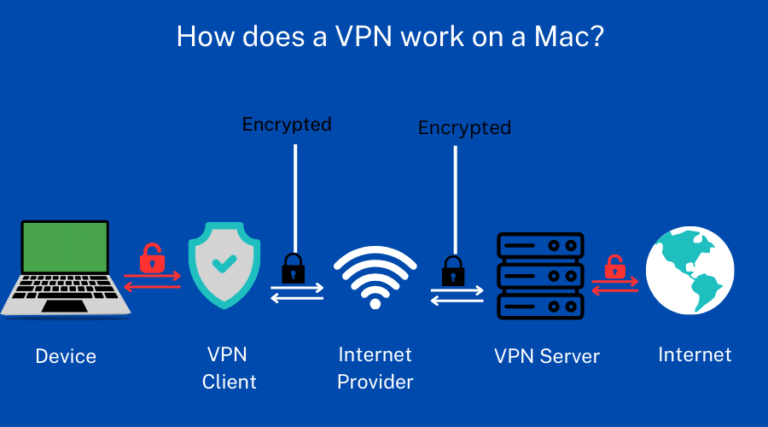
How does a VPN work on a Mac?

How does a VPN work on a Mac? Secure encrypted connections.

Using a VPN on your Mac creates a secure and encrypted tunnel between your device and a remote server.

It means any data you send or receive over the internet is crawled and kept away from prying eyes.

It also means that your internet traffic is routed through the remote server, making it appear that you are accessing the internet from a different location.

Why do you need VPN for macOS?

Why you need a VPN for macOS?

Apple computers are secure, and a VPN can add an extra layer of security to their online activity, protecting personal information from potential hackers and identity thieves.

A VPN can also be beneficial for browsing websites that use HTTPS, as it encrypts the data sent and received from that website, ensuring that everything is kept private.

Additionally, it can prevent the ISP from seeing what is done on the internet, providing a greater sense of privacy and control and allowing users to access content that might be restricted in their region.

By doing so, users can bypass geo-restrictions and access websites and apps that might otherwise be unavailable.

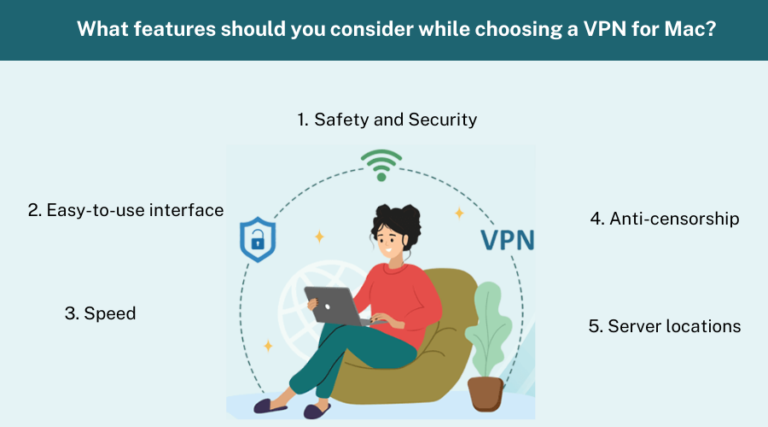
What features should you consider while choosing a VPN for Mac?

When selecting a VPN for your Mac, it is essential to consider safety, security, ease of use, pricing, compatibility, speed, entertainment options, anti-censorship, server locations, simultaneous device connections, and Torrenting support.

Considering these factors, you can find a VPN that meets all your needs and protects your online privacy and security.

Features to consider when choosing the best VPN for Mac.

1) Safety and Security:

When selecting a VPN for your Mac, it is essential to prioritize safety and security.

A VPN should protect your online activities from hackers, government surveillance, and cybercriminals. 

Look for a VPN that uses military-grade encryption, has a no-logs policy, and provides malware protection.

2) Mac OS & iOS client:

A good VPN should have a dedicated client for both macOS and iOS devices.

 It will allow you to secure all your Apple devices with a single VPN subscription.

 Make sure the VPN you choose is compatible with all your devices.

3) An easy-to-use interface:

A VPN should be easy to install and use. Look for a VPN with a user-friendly interface that does not require technical expertise.

A simple and intuitive interface will make it easier for you to navigate the VPN and protect your online activities.

4) Speed:

VPNs can slow down your internet connection, so selecting a VPN that does not compromise your internet speed is crucial.

 Look for a VPN with fast connection speeds and low latency.

5) Entertainment options:

If you want to stream content, choose a VPN to access a wide range of streaming services.

Look for a VPN to bypass geo-restrictions and unblock content from different regions.

6) Torrenting support:

If you are a fan of P2P file sharing, make sure the VPN you choose supports Torrenting.

Look for a VPN that allows you to download and upload files anonymously without restrictions.

7) Server locations:

The Number of server locations and their distribution is crucial for a VPN.

The more server locations a VPN has the easier to find a server near you.

Look for a VPN with many server locations in different regions.

8) Simultaneous device connections:

Consider a VPN that allows multiple device connections if you have multiple devices.

It will enable you to secure all your devices simultaneously with a single VPN subscription.

9) Anti-censorship:

A VPN should be able to bypass censorship and internet restrictions.

If you live in a country with limited or censored internet access, look for a VPN with anti-censorship features.

10) Pricing options and multiple payment methods:

VPN prices can vary widely, so choosing a VPN that fits your budget is important.

Look for a VPN with flexible payment options, including monthly and annual plans.

Consider the VPN’s pricing and ensure it provides good value for money.

To make an informed decision, dive into our comprehensive Buying Guide before choosing a VPN.

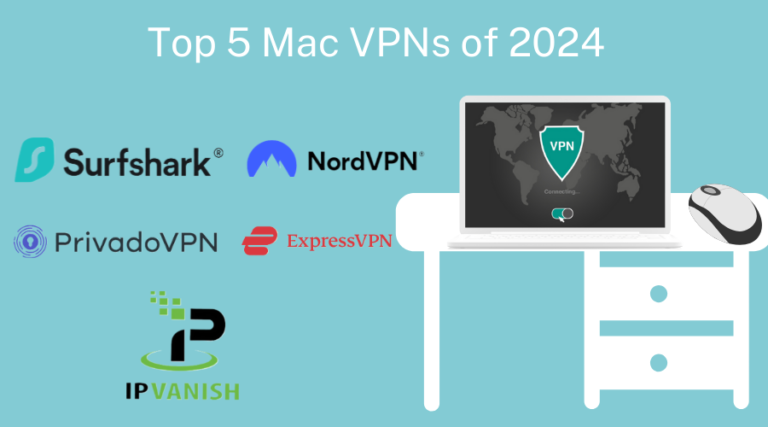
The Top 5 Mac VPNs of 2024: A Buyer's Guide and Rankings

Top 5 Mac VPNs of 2024.

In today’s world, it is essential to prioritize online privacy and security. Moreover, when it comes to Mac users, choosing the right VPN service can be challenging.

We have done the research and testing, and here are the top 5 Mac VPNs of 2024 that you can trust. Our ranking is based on the winning combination of speed, ease of use, and the strongest privacy features.

Therefore, whether streaming, gaming, or browsing the internet, these services perform flawlessly on Apple computers.

Our current favorite is Surfshark, which is an all-rounder and well-priced.

However, we also love NordVPN. So, without further ado, let’s dive into our top Mac VPN picks that will keep you safe and secure online.

The Top 5 Mac VPNs of 2024: Quick Comparison Table

#VPN ServiceDescription
1Surfshark The Best Value VPN for Beginners
2NordVPNThe Best VPN with the Most Features for macOS
3PrivadoVPNThe Best VPN for Gaming
4ExpressVPNThe Best VPN for Speed
5IPVanishTorrent-Friendly VPN with Super-Fast Speed

Surfshark is a rapidly growing VPN provider offering affordable and reliable VPN services.

Despite its low price, Surfshark competes with some of the most expensive VPN providers in terms of features and quality of service.

Key Features:

  • Thousands of servers spread across 100+ nations
  • A 30-day refund policy
  • Smart DNS
  • AES 256-bit encryption
  • Split-tunneling via its Whitelister tool
  • Dedicated P2P servers
  • Unblocks Netflix, Hulu, Disney+, Hotstar, BBC iPlayer, BT-Sports, etc.
  • Compatible with Windows, Mac, Android, Linux, iOS, Chromebook, Android TV, Amazon Firestick, etc.

Positives to buy:

  • Low subscription price
  • Good overall speeds
  • Kill switch feature
  • Data breach alerts

Negatives to Avoid:

  • Apps are simpler and basic
  • No Shadowsocks/Whitelister on the Mac app

Plans and pricing:

 StarterOneOne+
24 – Months$ 2.19 /month$ 2.69 /month$ 4.29 /month
12 – Months$ 2.79 /month$ 3.19 /month$ 5.09 /month
1- Month$ 15.45 /month$ 15.95 /month$ 17.95 /month

NordVPN is a popular choice for Mac users due to its high-security standards. 

Its Double VPN encryption and strict no-logging policy, audited by PricewaterhouseCoopers, make it one of the most secure VPN providers available. 

Its user-friendly interface and fast speeds make it a good choice for Mac users.

Check out our NordVPN review to learn more about one of the best VPNs available.

Key Features:

  • Thousands of servers spread across 111+ nations
  • Presets for servers feature
  • Kill switch feature
  • A 30-day refund policy
  • Unblocks Netflix, HBO, Hulu, BBC iPlayer, Spotify, CBS, NBC Live, etc.
  • Compatible with Mac, iOS, Windows, Linux, Android, Android TV, Roku, etc

Positives to buy:

  • High-speed performance
  • P2P servers
  • Threat protection
  • Verified no-logs policy
  • Cryptocurrency is accepted

Negatives to Avoid:

  • No split tunneling
  • No free version on the Mac app

Plans and pricing:

Plans and PricingGet BasicGet plusGet Ultimate
2-Year plan$ 3.99 /month$ 4.99 /month$ 6.99 /month
1-Year plan$ 4.99 /month$ 5.99 /month$ 7.99 /month
Monthly Plan$ 12.99 /month$ 13.99 /month$ 15.99 /month

PrivadoVPN is a newcomer yet highly rated, no-log VPN service that’s lightweight and robust. It offers fantastic speeds due to WireGuard and includes a decent free plan without speed limits.

Key Features:

  • Number of servers spread across 49 countries.
  • Split Tunneling.
  • Up to 10 simultaneous connections.
  • SOCKS5 proxy servers.
  • 31-Day Refund Policy.
  • Unblocks Netflix, Disney+, BBC iPlayer, and more.
  • Compatible with Windows, Mac, iOS, Linux, Android, Android TV, etc. 

Positives to Buy:

Negatives to Avoid:

  • Customer Service is subpar.
  • No audits or transparency reports
  • It doesn’t work in China

Plans and pricing:

PlanPrice/Month
24 Months Unlimited VPN + 3 Free1.99 /month
12 Months Unlimited VPN + 3 Free$2.99 /month
Monthly Plan$10.99 /month

4. ExpressVPN

ExpressVPN is a user-friendly, feature-rich VPN provider perfect for MacBook Pro users.

It’s simple yet powerful app offers fast speeds and robust encryption, ensuring a seamless and secure browsing experience.

ExpressVPN’s vast network of servers worldwide ensures maximum accessibility and reliability.

Key Features:

  • Thousands of servers spread across 105 nations
  • Split tunneling feature
  • Kill switch feature
  • Obfuscated servers
  • A fully Audited zero-logging policy
  • 24/7 live chat agents to get help when you need it
  • Unblocks Netflix, Hulu, Amazon Prime Video, Disney+, BBC iPlayer, etc.
  • Compatible with Mac, iOS, Windows, Android, Linux, Android TV, Amazon Firestick, Chromebook, Xbox, PlayStation, and other platforms, etc

Positives to Buy:

  • Incredible speeds on most servers
  • 30-day money-back guarantee
  • macOS apps are easy to install and use

Negatives to Avoid:

  • A little pricier than other servers
  • No phone support for customer service
  • Can only connect five devices simultaneously

Plans and pricing:

PlanPrice/Month
12 months $6.67 /month
6 months$9.99 /month
1 month$12.95 /month

5. IPVanish VPN

IPVanish is a secure VPN for Mac with unique security features, lightning-fast speeds, and customizable options that set it apart from other providers.

It is the best choice for Mac users who value privacy and performance because of its user-friendly interface and strong encryption.

Key Features:

  • Thousands of servers spread across 56 countries
  • DNS and IPV6 leak protection
  • kill switch feature
  • Standard AES-256 encryption
  • WireGuard tunneling Protocol
  • Unblocks Netflix, Vudu, HBO Max, the BBC iPlayer, and others, etc
  • Compatible with Mac, iOS (version 14.0 or later), Windows, Android, Linux, and other platforms, etc

Positives to buy:

  • Good overall speeds
  • A 30-day refund policy
  • Secure cloud storage service
  • Fast downloading speed
  • Highly configurable app

Negatives to Avoid:

  • US-based The Five Eyes
  • Poor Customer support
  • It doesn’t offer a cryptocurrency payment method

Plans and pricing:

PlanDurationPrice/Month
2 Years24 months$2.19
Yearly12 months$2.70
Monthly1 month$12.99

Free VPN vs. Paid VPN Service for Mac

Free vs Paid VPNs for Mac.

When choosing between free and paid VPN services for your Mac, weighing the pros and cons of each is crucial.

Free VPNs might seem attractive, but they often have downsides, such as slow connection speeds, data caps, and poor security.

Many free VPNs also sell user data to third parties, putting your personal information at risk.

In contrast, paid VPN services offer high-quality infrastructure, faster speeds, and increased security.

With revenue from subscriptions, paid VPNs can invest in reliable servers and provide excellent customer service to their users.

As cost is associated with paid VPNs, the benefits of increased privacy and faster speeds may make it worth the investment.

Ultimately, choosing between free and paid VPN services comes down to your needs and priorities.

If you’re looking for a reliable and secure way to protect your online activity on your Mac, a paid VPN service is likely the better option.

What are the best free VPNs for Macs?

Best free VPNs for Macs.

As discussed earlier, there are a few decent free VPN services, but they often have limitations and restrictions. One of the best free VPNs for Mac users is Atlas VPN.

With strong encryption and excellent speed results, Atlas VPN offers a seamless browsing experience. 

While the free version has limitations, including only three available locations and a 5 GB/month data cap, it is still a great option for users on a budget.

However, Proton VPN is the way to go if you want a free VPN service that offers unlimited data and excellent security features.

With servers in the US, Japan, and the Netherlands, Proton VPN provides complete privacy and anonymity. 

It’s VPN Accelerator and Stealth protocol features are a bonus for those who want to optimize their online experience.

In conclusion, while there are a few decent free VPN services for Mac, Proton VPN stands out as a reliable and secure option for users prioritizing their online privacy and security.

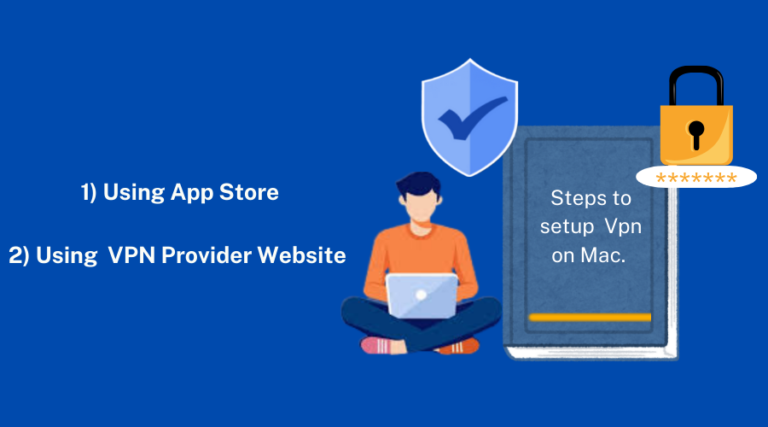
How to set up a VPN on Mac?

On macOS, setting up a VPN is the same as installing any other app. Here are the steps to set up a VPN on your Mac in a straightforward and easy-to-follow way:

  1. Research and choose a reliable VPN provider that suits your needs. Check for reviews, compatibility with your Mac version, and server locations.
  2. Subscribe to your chosen VPN provider and download their Mac client app.
  3. Install the app on your Mac and follow the setup instructions.
  4. Open the app and choose a server location from the available options. The closer the server, the faster the connection.
  5. Connect to the server by clicking the “Connect” button in the app. Wait for the app to establish a secure connection with the server.
  6. Once connected, you can start browsing the web, streaming videos, or accessing content from the server’s location, with added privacy and security.
  7. To disconnect, click on the “Disconnect” button in the app.

By following these steps, you can easily set up a VPN on your Mac and enjoy added security and privacy while accessing the internet.

Remember that the specific steps and options may vary depending on your chosen VPN provider.

So, read the instructions carefully and contact the Provider’s support team if you need any assistance.

Steps to set up VPN on Mac.

How to install a VPN on a Mac using the Apple App Store?

Downloading VPN software for Mac from the Apple App Store, a reputable source, is another option. 

Certainly! Using the Apple App Store, follow these steps to install a VPN on your Mac:

  1. Open the Apple App Store on your Mac. You can find it in the Applications folder or search for it using Spotlight.
  2. Search for the VPN app you want to install. You can use the search bar or browse the “VPN” category in the App Store. We recommend choosing a reliable and trusted VPN provider.
  3. Click the “Download” button next to the app, and wait for it to download and install. You may be prompted to enter your Apple ID credentials.
  4. Once the app is installed, open it from your Applications folder or Launchpad.
  5. Log in to your VPN account using the login credentials provided by your VPN provider. It may include a username and password or a unique access code.
  6. Choose a server location from the available options in the app. You can select the server based on your preferred location, speed, or specialty server type.
  7. Click the “Connect” button to establish a secure connection with the selected server. Wait for the app to establish a secure connection before starting your browsing session.

Following these steps, you can easily install a VPN on your Mac using the Apple App Store.

Make sure to choose a trusted VPN provider and follow the Provider’s specific instructions for installation and setup.

Enjoy a safe and private browsing experience with your new VPN!

How to install a VPN on a Mac through the Provider's website?

Here are the steps to install a VPN on your Mac through the VPN provider’s website:

  1. Subscribe to a top-grade VPN provider that meets your needs and requirements. You can do some research to find the best one for you.
  2. Go to the VPN provider’s official website and navigate to the downloads section. Look for the section that has downloads available for your operating system.
  3. Select your Mac OS version and download the appropriate installation file. Depending on the VPN provider, you may be asked to choose between different file types, such as a .dmg file or a .pkg file.
  4. Once the download is complete, locate the installation file in the downloads folder and double-click it to start the installation process. Follow the on-screen instructions to install the VPN app on your Mac.
  5. After the installation, open the app and log in to your account using the credentials provided by your VPN provider.
  6. Choose a server location from the available options in the app. You can select the server based on your preferred location, speed, or specialty server type.
  7. To establish a safe connection with the chosen server, click the “Connect” button. Before browsing, wait for the app to establish a secure connection.

Following these steps, you can easily install a VPN on your Mac through the Provider’s website and enjoy a secure and private browsing experience.

Make sure to choose a trusted VPN provider and follow the Provider’s specific instructions for installation and setup.

Final Thoughts on the Best VPN for Mac

In conclusion, while Mac devices may be less prone to malware and viruses, taking your online security seriously is still essential.

Luckily, there are many VPN providers, including the 5 best we discussed earlier in this article Surfshark, NordVPN, PrivadoVPN, ExpressVPN, and IPVanish.

Each VPN offers unique features and benefits, and no clear winner exists. NordVPN is known for its excellent security, PrivadoVPN is popular for its gaming experience, ExpressVPN has lightning-fast speeds, and IPVanish offers amazing customization options.

However, we recommend Surfshark as the best VPN for Mac users. While it’s not free, it offers a 30-day money-back guarantee to try it out risk-free.

Surfshark offers top-notch security features like a kill switch, MultiHop, and a no-logs policy, as well as the ability to unblock geo-restricted content.

However, if a paid VPN is out of reach, Proton VPN is a good free option, although it does have data caps and speed limitations.

Overall, a VPN is essential for anyone looking to enhance their online privacy and security, and Surfshark VPN is our top recommendation for Mac users.

FAQs: Best VPN for Mac

Do Macs have a built-in VPN?

MacOS has built-in VPN support with the L2TP/IPSec and IKEv2 protocols; Macs do not have a built-in VPN.

It would be best if you still had an external server to accept your incoming connection to use the built-in VPN support.

You can manually configure a VPN connection through System Preferences or sign up with a third-party VPN provider and download their Mac app for quick and easy setup.

Do Macs need VPNs?

When using public Wi-Fi while traveling or Torrenting at home, a Mac VPN offers a secure network for internet access. 

While Macs are excellent at stopping malicious software from getting into your computer, they can’t do anything once your data has left.

 A VPN is the only way to ensure your data is secure on unsecured connections.

Moreover, VPNs are essential for Macbooks as they offer protection against data leaks, privacy breaches, and other online dangers.

 Additionally, VPNs allow you to bypass geographical restrictions and access more content.

Is it safe to use a VPN on Mac?

Using a VPN on a Mac can be a safe and effective way to protect your online privacy and security.

Apple offers a range of modern security features that are useful in keeping your data secure. Still, a VPN adds an extra layer of protection by encrypting your traffic and keeping your browsing activity private.

It helps shield your online activities and personal information from third parties.

Additionally, a VPN allows you to access geo-blocked content and bypass strict firewalls, making it a versatile tool for personal and professional use.

With unique technology enabling you to bypass censorship, a VPN is beneficial in highly censored countries like China, Russia, and UAE.

Do Mac VPNs work in China?

Yes, that is correct. It’s important to note that while many VPNs claim to work in China, not all can bypass the country’s sophisticated VPN-blocking technology.

This is why choosing a VPN provider with a proven record of success in the region is essential.

In addition to ExpressVPN, other VPN providers known to work well in China include NordVPN and Surfshark.

Using a reliable VPN with obfuscated servers, you can bypass China’s internet censorship and access the content you need.

What can I do with a VPN for Mac?

  1. Access new streaming platforms and content libraries by changing your location. Learn more about how to easily do this in our guide on how to change location on Mac using a VPN.
  2. Torrent without significant risks and avoid data leaks, security breaches, malware, or financial losses.
  3. Save money while shopping online by spoofing your location to see better and unbiased costs.
  4. Enjoy free internet globally and punch through firewalls to access websites and content.

What is a shared secret in Mac VPN?

A shared secret or pre-shared key (PSK) is a data string sent to a VPN server before sending any credentials. This helps to ensure that only authorized users can access the network.

A PSK is a simple yet effective secure VPN connection method in enterprise networks. A text string is exchanged between the VPN client and server for connection authentication.

Which Mac VPN is best for Netflix?

When it comes to finding a Mac VPN for Netflix can be a challenge. However, a few VPNs have proven reliable in accessing multiple regional Netflix libraries.

This is due to Netflix’s ongoing IP address blocking, which forces VPNs to anticipate these restrictions.

ExpressVPN is a popular alternative as it frequently updates its servers and IPs.

For even more Netflix compatibility, think about using a VPN with Smart DNS, such as ExpressVPN, NordVPN, or Surfshark, to unblock Netflix on your Apple TV.

What is the best VPN extension for Safari?

Regarding VPN extensions for Safari, ExpressVPN is the top pick. While it does require the installation of the native app, the browser extension allows for convenient control of the VPN within the Safari browser.

However, if you prefer not to use a browser extension or if you use other browsers, many VPN providers offer MacOS apps that will cover all your online activity, including within Safari.

Unfortunately, due to changes in Safari’s support for third-party extensions, there are currently no VPN browser extensions available for Safari.

Is there an Apple VPN for Mac?

Yes, Apple offers a feature called Private Relay for paid iCloud subscribers, which some have referred to as a built-in VPN. 

However, it prevents you from spoofing your location or bypassing internet restrictions.

The good news is that most VPNs offer dedicated apps for macOS and iOS that encrypt data from all of your apps, not just the Safari browser.

Moreover, renowned providers often don’t record your IP address, which is a massive benefit for anyone concerned about online privacy.